pinterest

Thursday, December 27, 2012

Scor-Pal and Fancy Pants

Everyone loves a party! This year for New Years, we are going to a game night with the kids and I wanted to bring along a little something for the adults.

Here is the supplies I used:

a sheet of acetate
Fancy Pants Country Boutique Collection Kit
Magnolia Tag and Swirly Heart Die
Spellbinder Die
Martha Stewart punch
Maya Roads fabric flowers


Here is a close up of the top and the tag that I made


and the label on the bottom


First start with a piece of 9" x 9" black corrugated paper, score at 3" and 6" and turn the paper 90 degrees and score again at 3" and 6". 


Adhere the box together using Scor-Tape.


The next photo is a little hard to see because it is the acetate.  Cut a piece of acetate 11" x 10", score 1/2, 3 3/4", 6 1/2 and 9 1/2"  make sure you score them really well, it will be easier to fold them.  For the back piece cut a piece of acetate 2 7/8" x 11".


Fold the box together as shown below.


Using Scor-Tape secure the acetate to the corrugated box. 


For the top, use a 5" x 5" piece of paper and score 1" on each side.


To make a circle in the middle for the wine bottle to peak out of, use a cutting template and cut a circle in the middle.  I used Creative Memories cutting system using the #4 circle with the red blade.


Now decorate to make it look festive!
Happy New Year!

Lisa Andrews


Saturday, December 15, 2012

Coordinations & Scor-Pal


Hi Everyone!!  This week  Scor-Pal is hopping along with Core'dinations to bring you a fun filled week of great projects! 

Lisa A. here, today I made a simply and easy gift card holder and vintage looking snowman gift tags for your last minute gifts.  These would be great for teacher gifts, secret santa gifts or for anyone on your gift lists!   I also made a quick card.

Supplies:

Core'dinations Vintage card stock
white and sparkly red card stock
Scor-Tape
Scor-Pal
Hot Glue
black jewels
various punches and embossing folders


Let's start with the gift card holder.  I saw this idea for a gift card holder at a scrapbook store here in town and went home to make one of my own right away!


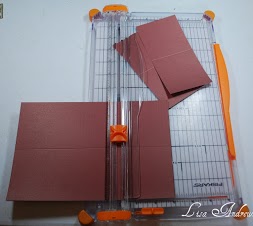
Start with a piece of 5 1/2" x 6 3/4" core'dinations vintage red, score at 1 1/2" on each side.


Assemble box with Scor-Tape


For the top start with a white piece of card stock 5 3/4" x 4 1/2", punch around the edges, you really don't need to be perfect with this since you will fold the sides in to create the top of the box.  Score at 1" on all sides.  Using a punch, punch a snowflake on the left bottom of the lid.  Assemble the top using Scor-Tape.


Cut a piece of sparkly card stock 2 1/2" x 3 3/4" and adhere to the underside of the snowflake.


Next, we are going to make the snowman rosette.  Using a 1 1/2" x 12" piece of vintage Core-dinations card stock, score every 1/2", turn the card stock over and score again starting at 1/4" and every 1/2" from there.  Fold the card stock into an accordian, using the indented score mark as your mountains and raised up score mark as your valley.  Attach the end of the card stock together with Scor-Tape. 


Using a 1 3/4" punch, punch a circle and hot glue it to the back of the rosette.


For the snowman's hat, use a 1 3/4" x 6" piece of vintage black Core'dinations card stock and score every 1/2", turn the card stock over and score again starting at 1/4" and every 1/2" from there.  Fold the card stock into an accordian, using the indented score mark as your mountains and raised up score mark as your valley. 


Gather the bottom of the card stock together and hot glue to the snowman's head.


Using a piece of vintage black Core'dinations card stock, cut a piece 3/4" wide for the brim of the hat.  Don't forget to sand all of the edges with sandpaper to give it that vintage look.  Cut a carrot nose out of vintage orange Core'dinations card stock and adhere it to your snowman.  Add black jewels for eyes.  Repeat three times for three tags.  Don't forget to stamp a message on the back!


Now we are going to make a little gift box for your gift tags.  Starting with an 8 1/2" x 6 1/2"  piece of vintage green Core'dinations card stock, score 2 1/2" on all sides.  Cut 1 3/4" from the corners as shown below.


Punch a snowflake on the front of the box.


Sand your edges and adhere box together with Scor-Tape.


Thanks for joining us this week.  I hope you got a lot of inspiration to make to homemade this year!

Lisa Andrews


Saturday, December 8, 2012

Santa's Sleigh

Hello everyone!  Today Lisa has created a beautiful gift holder!  Who wouldn't want to receive Santa's Sleigh with a gift just for them inside.

Supplies:

1 piece of red card stock
a scrap of gold card stock
Scor-Pal
Scor-Tape
Memory Box Die - Corner Bow
Spellbinder Die - largest one
Snow Maker
Wild Orchid Flowers
Ribbon
Sentiment Stamp from Lily of the Valley

Cut a piece a red card stock 3 1/2" x 5 1/2".  Score 1" on every side to create a box that will be the base of the sleigh


Cut a square using the Spellbinder Die and line it up as shown in the picture.


like this:


Cut the Corner Bow with gold card stock and adhere as shown.  Now you have your three pieces to create the sleigh.


Lisa saw this cool little trick to cut a mini label HERE on Pinterest.  First cut your label and position it as shown below.


Then layered onto a piece of red card stock.


Here is the sleigh, all decorated and ready to be given! 


Hope you enjoyed Lisa's tutorial!

Saturday, November 17, 2012

Scor-Pal & Hampton Art

Good Morning!  Welcome to the Scor-Pal & Hampton Art Blog Hop.  I hope you have had fun with this weeks' projects.


Today Lisa has provided us with a Trifold Pocket Card.  We all love a little mischief in our lives but sometimes even the littlest things causes so much havoc.  Instead of yelling and getting upset, grab your camera for that special Kodak moment and make a card that someone will truly never forget!  Isn't it just so adorable how the dog is peaking out of the top of the card?

Supplies:

My Minds Eye designer paper
Creamy Brown Fluid Chalk
Hampton Art Stamps:  Woodlands, Sunbathing and My Goal In Life
Shrink paper
Staz-On black ink
colored pencils
Scor-Pal
Scor-Tape
Hemp


Lisa used THIS tutorial for her card.  It is super simple and quick to make.  

Start with an 8 x 8 1/2" piece of designer paper, line the 8 1/2" side up with the top fence of your Scor-Pal, score at 2 1/4" and 6 1/4".  Turn the paper 90 degrees and score at 2 1/2", this will be the bottom of the card.  On the top of the card round the corners, note: I used my Scor-Tape to round the corners.  Cut the small rectangles out from the bottom of the card.  Fold both sides in and then the bottom flap up and secure with a belly band.  For the belly band, cut a piece of matching designer paper 2 1/4" x 8 1/2" and adhere it together on the back after you wrapped it around your card.  Lisa distressed all of   the edges with Creamy Brown Fluid Chalk.  She used an 5" x 7" picture for the inside and cut it down to fit inside the pocket and then matted with a piece of card stock.

For the sentiment tag, Lisa used a Spellbinder nestables.  She first stamped the sentiment, My Goal In Life and then stamped Woodlands with Versa Mark and embossed it with clear embossing powder and then carefully inked the edges and paper with Creamy Brown Fluid Chalk to give it an aged, distressed look.

Lisa used Shrinky Dink paper to stamp Sunbathing on with black Staz-On ink. Note: let ink dry completely before coloring with colored pencils.  Punch a hole where you want the tag to be secured from and then shrink with your heat embossing tool, making sure to push the edges down to create a flat tag.  It is best to have another person to help you with this.  Attach tag to your card using hemp.


Glad you stopped by today and we hope that you will give this TriFold Pocket Card a try


Friday, November 16, 2012

Gift Card Envelope

Hi everyone, I am here today to share with you a simple gift card holder using my Scor-Pal and Scor-Envi!

Supplies:
Scor-Pal
Scor-Envi
1/4" Scor-Tape
designer paper

First start with a 4 5/8" x 4 5/8" square, for the 1st score, score at 4 1/4" and 7 3/4".  Turn your paper 90 degrees and score at 4 3/4" and 7 1/4".

Adhere Scor-Tape as shown below


and Viola!  you have a cute little gift card envelope!


Thanks for stopping by!  Hope you enjoyed today's little tutorial.

Lisa

Monday, November 12, 2012


Today the Scor-Pal team starts a week long feature with the crafters at Hampton Art.  You can check out my project this week along with one other on the Scor-Pal blog.  Be sure to visit every day (and the Hampton Art blog too) for a chance to win a great prize.

Saturday, October 27, 2012

Scor-Pal and DCWV

 &
Hi everyone!  I am so happy that Scor-Pal and Die Cuts With a View has teamed up to bring you a fabulous Blog Hop!  Their new line, Autumn Splendor is just gorgeous!  Along with my post today, I will be featuring projects used from the line all week long on my blog.  I am so happy that fall is finally here.  We have had both beautiful fall days and crisp fall days here in Colorado.  That means that snow is not far away!

Of course, if you missed any of the great projects from this week, just scroll down to see what has been going on.  Be sure to leave some love on each post for a chance to win some great prizes.

OK, onto my project.  Believe it or not, this project only takes about 30 minutes to complete!  Yup, you read right, 30 minutes!  I am going on a scrapbooking/crafting retreat in a few weeks and decided to make these little note cards and holders for the girls.


Here is what you need to get started:

2 pieces of cardstock to match designer paper(Autumn Spendor cardstock) DCWV
1 piece of cream cardstock
1 piece of designer paper from Autumn Splendor, DCWV
punch
monogram stamp to emboss
Ribbon to match
Lacy ribbon
Scor-Pal
paper trimmer
Scor-Tape


First we are going to cut out our note cards, one sheet of cardstock will make 8 note cards.  Since I was making a number of note card holders, I used 4 note cards for each holder.  (1) Score an 12" x 12" piece of cardstock at 3" and 9", (2) next cut the cardstock in half, 6".  (3) Then stack each side on top of each other and cut 3" cards, as shown below

(1)

(2)

(3)

From the cream cardstock, cut 5 - 2"x2" squares, from coordinating piece of cardstock cut 5 - 1 3/4" x 1 3/4" squares, now cut 4 - 2 7/8" x 2 7/8" squares from your designer paper.  Fold cards in half and layer with all of the squares.  My monogram stamp was 1 1/2" x 1 1/2".  I stamped the monogram, then embossed with gold embossing powder.  Viola!  Note cards done!


Now for the basket.  Cut a piece of designer paper, 3" x 11" and punch on the top edge.  (1) Next, using a piece of matching cardstock, cut a piece for the bottom, 3" x 4" and score each side at an 1/2".   (2) Construct a small box out of the cardstock and wrap it on the outside with 1/4" Scor-Tape.  (3) Wrap the designer paper around bottom piece.  Tip:  I pinched the corners when I came to them.  Attach a piece of Scor-Tape to the edge and close basket.

(1)

(2)

(3)

(4)

Next, wrap a piece of 1/4" Scor-Tape around the top and attach lace.  Add two pieces of 1/4" Scor-Tape to the front and back.  This will attach the ribbon handles, ribbon is about 8" long, you will need 2 pieces.


And your done!  Easy Peasy!

Hope you enjoyed my tutorial today!  Have lots of fun hopping along!

Lisa Andrews